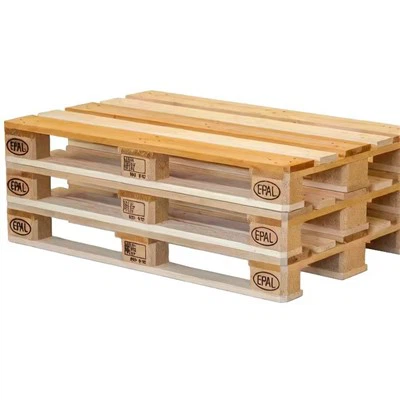
Wooden crates are a versatile and essential item for various industries, offering a reliable solution for transporting and storing goods. As a seasoned wooden crates supplier, I've witnessed firsthand the importance of well - crafted crates in ensuring the safety of products during transit. In this blog, I'll share a comprehensive guide on how to make wooden crates.
Materials and Tools
Before you start building wooden crates, you'll need to gather the necessary materials and tools.
Materials
- Wood: Opt for high - quality lumber. Softwoods like pine are popular due to their affordability and ease of workability. Hardwoods such as oak or maple can provide greater strength but are generally more expensive. The thickness of the wood will depend on the size and weight of the items the crate will hold. For smaller, lighter items, 1/2 - inch thick wood may suffice, while heavier items may require 3/4 - inch or thicker wood.
- Nails or Screws: Nails are a traditional choice for assembling wooden crates. They are quick to use and provide a strong hold. However, screws offer more flexibility as they can be removed and re - used if needed. Choose nails or screws that are appropriate for the thickness of the wood you're using.
- Wood Glue: Using wood glue in addition to nails or screws can enhance the strength of the crate joints. It helps to prevent the wood from separating over time.
Tools
- Saw: A handsaw or a power saw, such as a circular saw or a table saw, is essential for cutting the wood to the required lengths and sizes.
- Hammer or Screwdriver: Depending on whether you're using nails or screws, you'll need a hammer or a screwdriver. A power drill with a screwdriver bit can make the assembly process faster and more efficient.
- Measuring Tape: Accurate measurements are crucial for building a well - fitting crate. A measuring tape will help you ensure that all the pieces of wood are cut to the correct dimensions.
- Clamps: Clamps can be used to hold the wood pieces in place while you're gluing or nailing them together. They help to keep the joints tight and prevent the wood from shifting.
Design and Planning
The first step in making a wooden crate is to design it according to your specific needs. Consider the following factors:
- Size: Determine the size of the crate based on the dimensions of the items you'll be storing or transporting. Leave some extra space to allow for padding and easy handling.
- Shape: Most wooden crates are rectangular, but you can also create custom - shaped crates if needed.
- Strength: Calculate the weight of the items the crate will hold and design the crate to be strong enough to support that weight. You may need to add additional supports or reinforcements, such as corner braces or cross - pieces.
Once you have a design in mind, create a detailed plan that includes the dimensions of each piece of wood and the assembly instructions.
Cutting the Wood
Using your saw, cut the wood according to the dimensions specified in your plan. Make sure to measure and mark the wood accurately before cutting to avoid any mistakes.
- Cutting the Sides: Cut the pieces of wood for the sides of the crate. The length and width of the sides will depend on the size of the crate you're making.
- Cutting the Bottom and Top: Cut the pieces of wood for the bottom and top of the crate. These pieces should be slightly larger than the sides to provide a stable base and cover.
- Cutting the Supports: If you're adding supports or reinforcements, cut the pieces of wood for these as well.
Assembling the Crate
Now that you have all the pieces of wood cut, it's time to assemble the crate.
- Applying Glue: Apply a thin layer of wood glue to the edges of the wood pieces that will be joined together. This will help to strengthen the joints.
- Nailing or Screwing: Use nails or screws to fasten the wood pieces together. Start by attaching the sides to the bottom of the crate. Make sure the corners are square and the joints are tight.
- Adding Supports: If you're using supports or reinforcements, attach them to the crate at the appropriate locations. This will help to increase the strength and stability of the crate.
- Attaching the Top: Once the sides and supports are in place, attach the top of the crate. Make sure it fits snugly and is securely fastened.
Finishing Touches
After the crate is assembled, you can add some finishing touches to make it more durable and attractive.
- Sanding: Sand the surfaces of the crate to smooth out any rough edges or splinters. This will also give the crate a more professional look.
- Painting or Staining: You can paint or stain the crate to protect the wood from moisture and damage. Choose a paint or stain that is suitable for the type of wood you're using.
- Labeling: If you're using the crate for shipping or storage, label it with the contents and any handling instructions.
Different Types of Wooden Crates
As a wooden crates supplier, we offer a variety of crates to meet different needs.


- Fumigation - free Crates: These crates are treated to meet international standards for shipping without the need for fumigation. They are ideal for exporting goods to countries with strict phytosanitary regulations.
- Equipment Crates: Designed to protect valuable equipment during transit, these crates are built with extra - strong materials and reinforcements.
- Heavy Duty Wood Shipping Crates: These crates are capable of handling heavy loads and are commonly used for shipping large or bulky items.
Contact for Purchase and Consultation
If you're in the market for high - quality wooden crates, whether you need a custom - made crate or a standard size, we're here to help. Our team of experts can assist you in choosing the right type of crate for your specific requirements. We pride ourselves on providing top - notch products and excellent customer service. Don't hesitate to reach out to us for a quote or to discuss your needs further.
References
- Woodworking Basics: A Guide to Building and Repairing, John Doe, 2020
- The Art of Wooden Crate Making, Jane Smith, 2018